
How to use Power Automate to generate OneDrive shared links
Microsoft’s Power Automate is a great tool to automate certain processes and workflows without requiring advanced coding skills. This post shows you an example of how we can leverage Power Automate in a real-life business task.
Task Description
We have 500 documents that need to be sent out to their respective clients. Instead of attaching the documents themselves, the clients prefer to receive URL links and view them online. No client can access other clients’ documents. Also, the leadership would like to have access to these documents. A shared OneDrive folder hosting all of them would be ideal.
There are several email marketing services we can use for the email task. But we need to have the URL info. Getting them manually from OneDrive is way too time-consuming, so we need an automated solution.
Automated Solution
Step 1 - Create a folder in your OneDrive
You will place all the documents in this folder after the entire process is set up. For now, just create the folder and leave it empty.
Step 2 - Create an Excel file in your OneDrive
The first column lists the full name of each document. In this case, the naming convention for the document is simply “Letter -” plus the client name plus the “.pdf” file extension. The second column is where the URL links will be populated. For now, it’s empty.

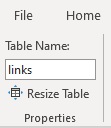
Once the setup is done, click Insert and click Table. Make sure “My table has headers” is checked. Then give the table a meaningful name. In this case, I named it “links”. Now close this Excel file.


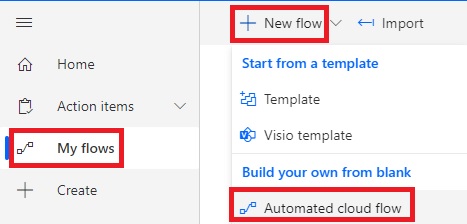
Step 3 - Create a flow in Power Automate
Log into Power Automate and create a new flow.
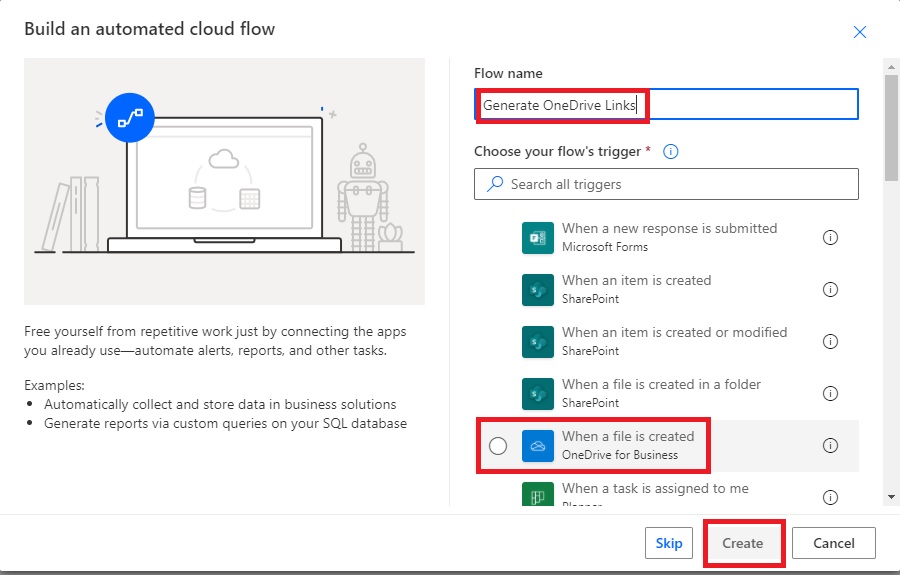
Give the flow a name, pick the first action, and hit Create.
Locate the folder you created in Step 1, and then click New Step.
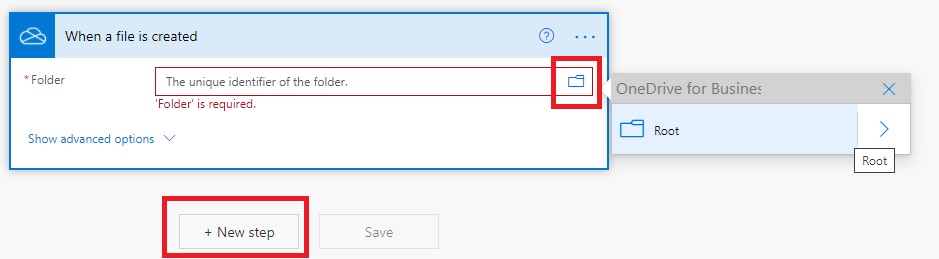
Type in the name of the next action in the search bar.

Set up the rest of the flow based on the screenshot below.
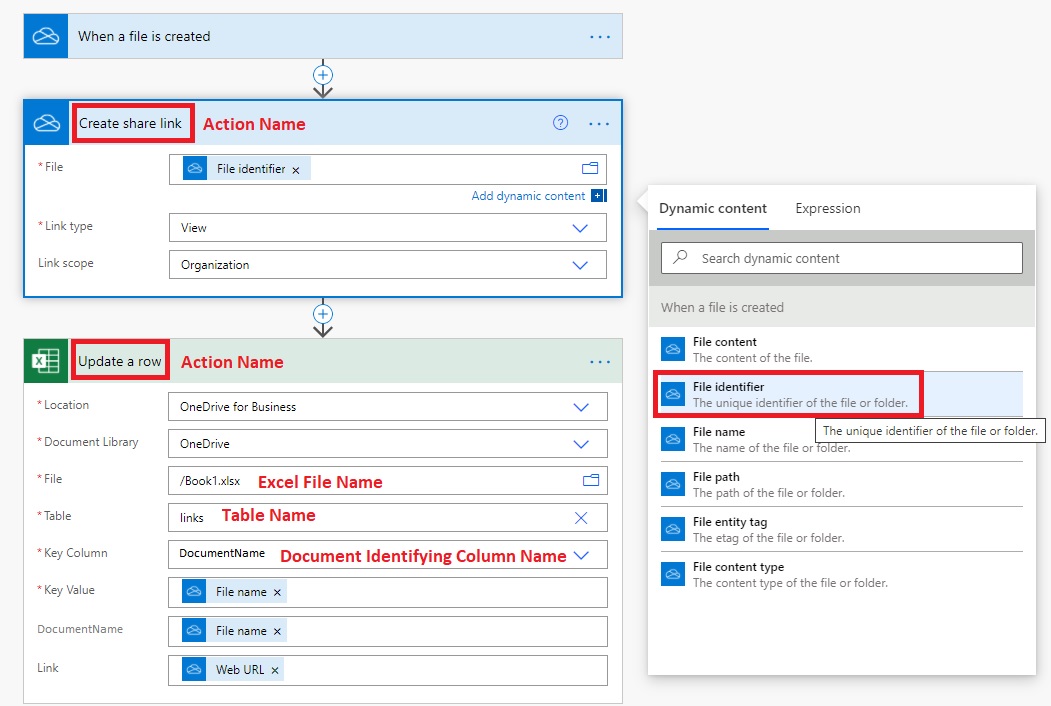
Once done, save the flow, and exit to the flow homepage.
Step 4 - Upload the documents and watch the flow run
Now we've set up the flow. We can upload all the documents to the folder we created in Step 1. Wait till they are fully uploaded to OneDrive and you should be able to monitor the running process of the flow on its homepage. If all goes well, the status would change to Succeeded after the flow has finished running.

Then open your Excel file and you should see the Link column has now been populated with the URL info.