
How to deploy a simple Python app using Heroku?
This post walks you through how to set up a simple Python app where one can upload data, triggering a script to read the uploaded data and process it, and download the results in the end. This can serve as a starting point for more sophisticated use cases. We will employ Flask as the framework and Heroku as the deployment platform.
A Short Description of the App
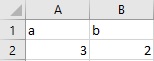
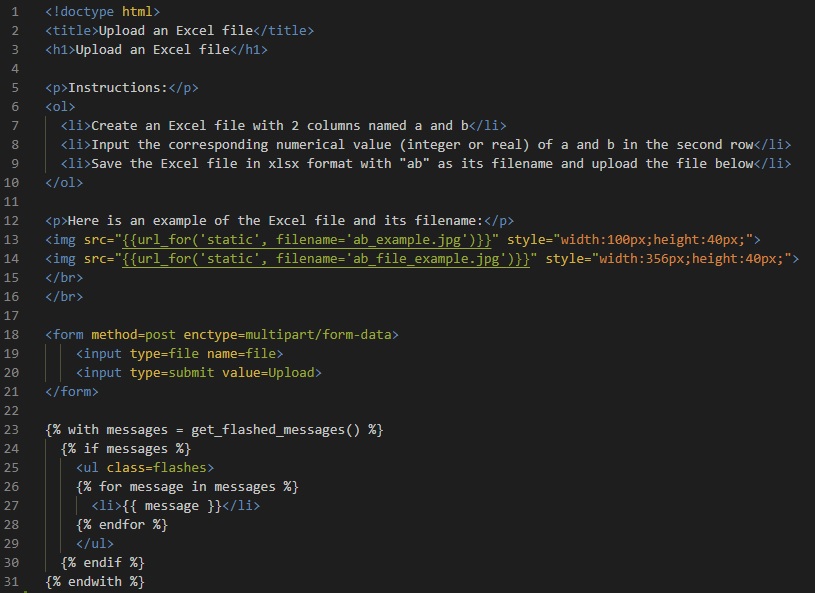
A user uploads an Excel file named “ab” like the following.
After uploading, the app computes the sum of a and b, and prints the result on the web page.
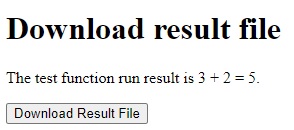
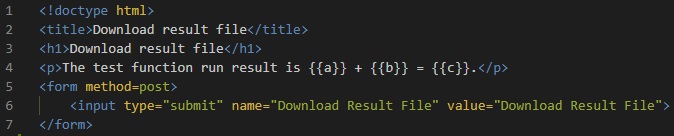
The user can also download the result as an Excel file named “c”, which looks like the following.

Hence, we have an app that can read user-provided data, perform some calculations at the back end, and output the result in a downloadable manner. You can test this app yourself here and access the codebase on my GitHub.
A Step-By-Step Guide
Step 1 - Project layout
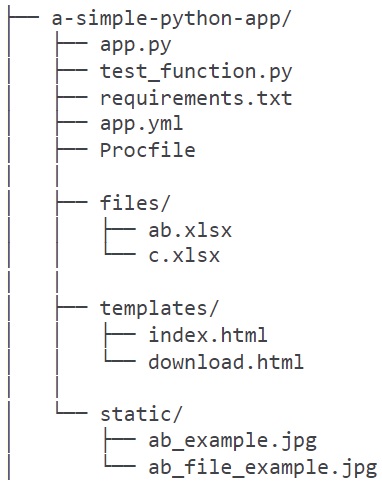
The root folder named “a-simple-python-app” includes all the files needed for our app. Inside the root folder, we have:
app.py: dictate the URL routing
test_function.py: the script we want to run after a user uploads the input data
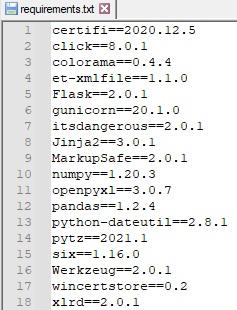
requirements.txt: list all the packages needed and their version numbers
app.yml: specify Python and its version as our runtime
Procfile: specify the commands that are executed by the app on startup (needed if use Heroku)
files: a subfolder where both uploaded and downloadable Excel files live
templates: a subfolder for HTML files
static: a subfolder for image files
Below is the detailed project layout:
Step 2 - Write the Python script you want to run
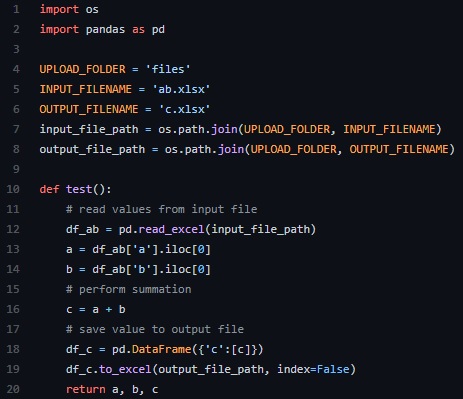
The purpose of this post is to show how one can read user-provided data, trigger a Python script, and output the computed result. Therefore, we use a very simple script here. It has a custom function named test. The test function reads the ab.xlsx file, adds the two values up, and spits out the sum in the c.xlsx file. You can also access the script here.
Step 3 - Make HTML files and app.py file
We start with our homepage HTML file called index. First, it gives a set of instructions (supported by screenshots) on how to prepare the input Excel file. Second, it uses a form to collect the input file from a user. Last, it uses Jinja to display simple feedback messages when a user has failed to upload the input file correctly.
The download.html file displays the inputs and computed sum on the web page, as well as provides the user with an option to download the result in an Excel file.
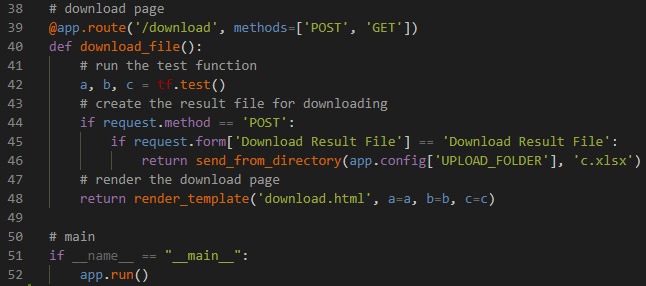
The app.py file dictates the routing. The route() decorator binds the upload_file function to the homepage URL. Upon a user submitting a correct input file, it calls the download_file function which is bound to the download page URL.
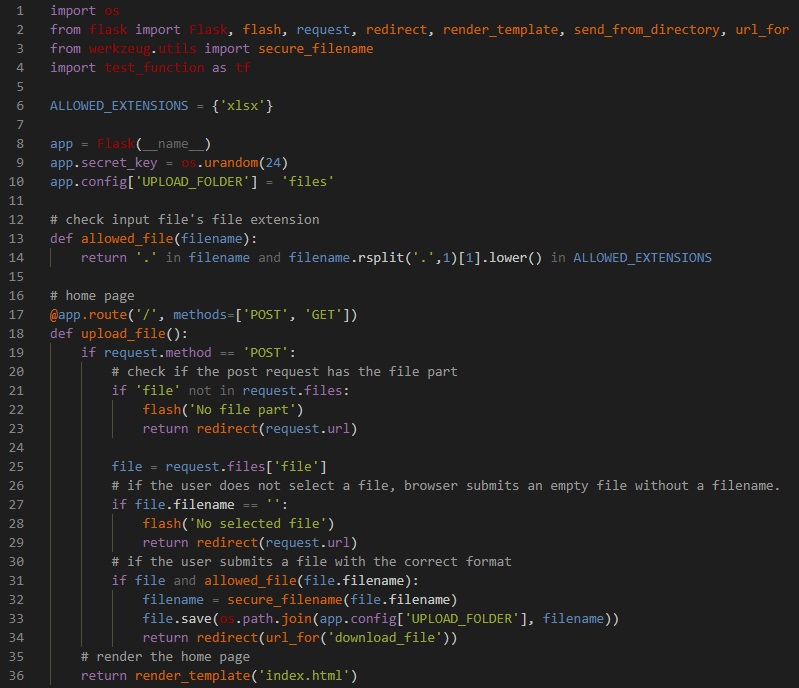
The download_file function calls the test_function Python script and then prints the result on the page as well as gives the user an option to download that result.
Step 4 - Create other files
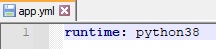
Create a YML file to specify Python as the runtime environment as well as the version of Python you are using.
One simple way to create the requirements file is to create a new virtual environment, pip install all the packages needed, and use pip freeze to generate the requirements. Here is a good how-to blog post on this.
Heroku requires the Procfile file for deployment. Please see their site for detail and more advanced usages.

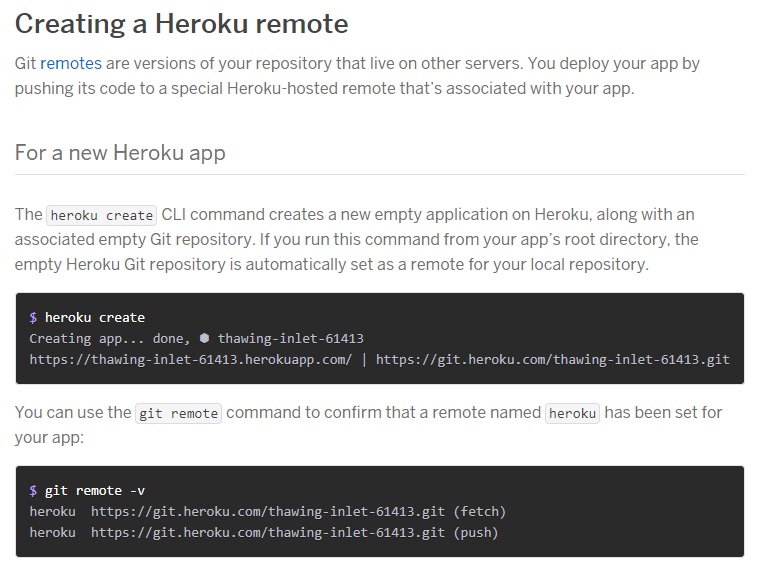
Step 5 - Set up Heroku and deploy the application
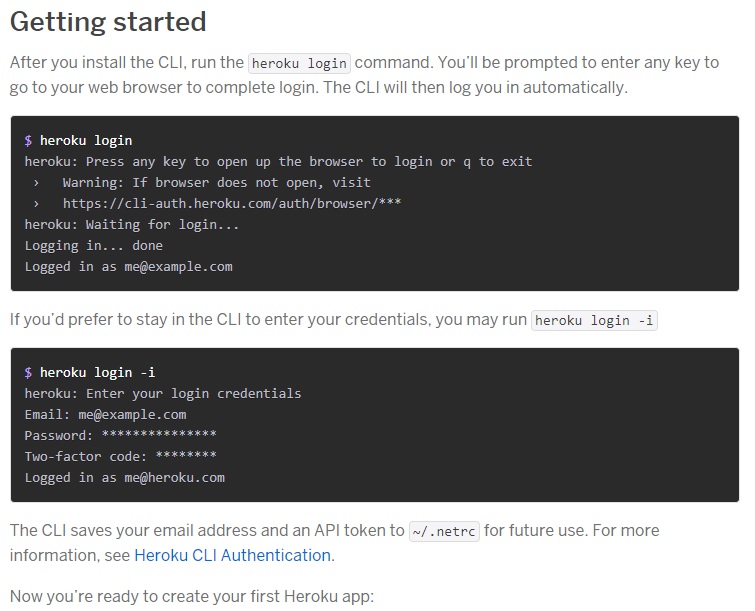
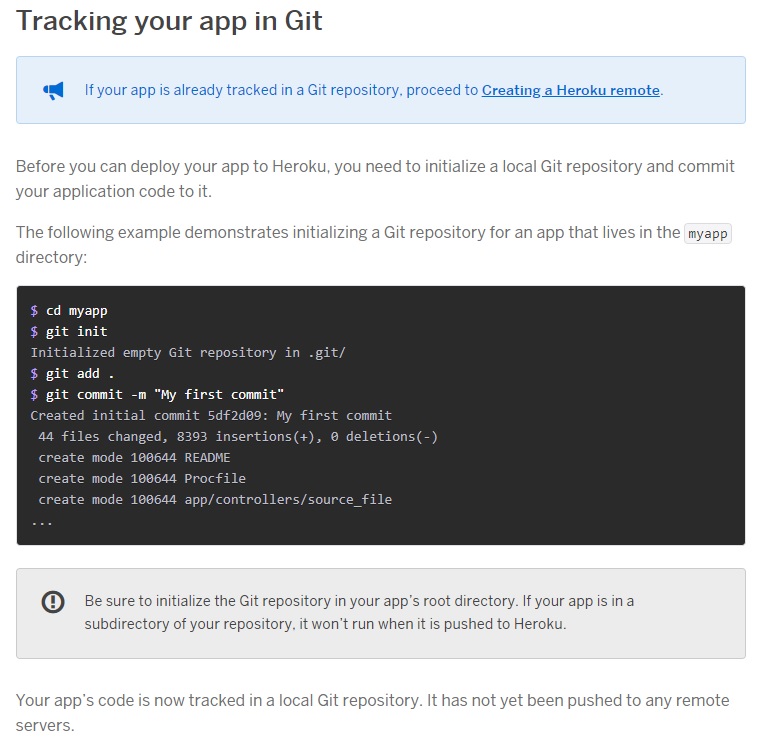
We use Git for deployment. First, install Git if you haven’t yet. Then install Heroku CLI, which requires Git. After the installation of both, log in Heroku and follow the instructions on its website to deploy the app.
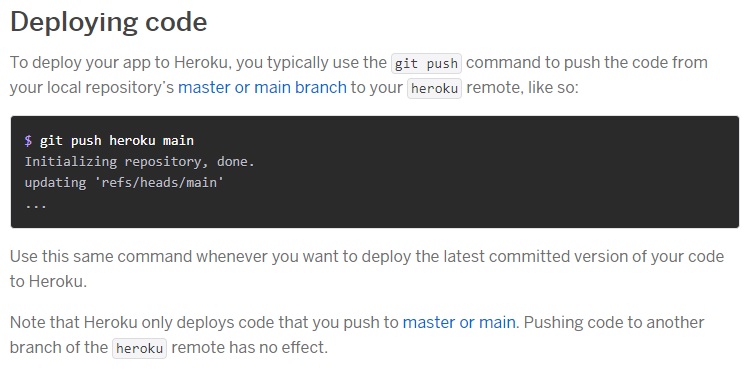
If all goes well, you should be able to check out your app online! The URL structure is: https://[app name].herokuapp.com. Heroku auto-generates an app name when you first create the app. You can rename the app later if desired.